Ecoplus III: Image Handling
After the hackathon, we took a break for a few weeks before embarking on our last two sprints. During the hackathon, I failed to implement image upload and delete functionality, so that naturally became my goal for the remaining weeks. In the third sprint, I added image upload functionality, and in the fourth sprint, I added image delete functionality and ensured a consistent UI across the pages which had image modification operations involved.
New Features
In the last two sprints, here are the features we added:
General
- Model annotations with tooltips
- Upcoming Events
- Forgot password
Community
- Editing, deleting, and leaving of community
- Upload of profile and cover photos
- Search by name
Event
- Editing and deleting of event
- Upload of profile and cover photos
- Event location map
Account
- Editing of account details
- Upload and delete profile photo
Education
- Recycling Page
- Interactive game
Image handling
Netlify image handling
The problem I faced was that Netlify functions couldn't handle multipart form data such as images properly. It actually took me a lot of time researching this issue, only to find out I couldn't send images to the server the traditional way and had to look for alternative methods.
I settled with sending a base64-encoded string instead of the image file, which worked well. One caveat of this method is that large images would not upload properly as their base64-encoded string would be too large.
Storing images on Supabase
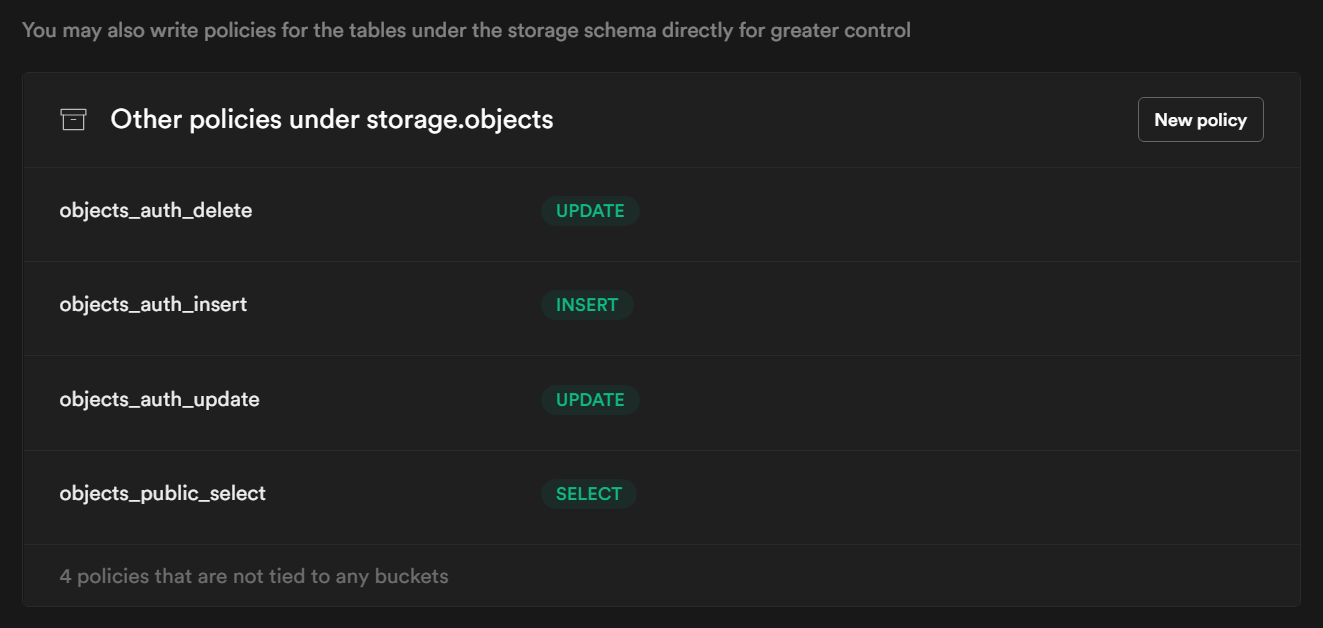
After receiving the base64-encoded string in the serverless function, I decoded it to create a Buffer and sent it to Supabase. On Supabase's side, I also ran into a lot of issues with basic CRUD operations. I needed to add the suitable PostgreSQL policies for the storage we used for storing files. The policies I added allowed anyone to read from the storage, and only authenticated users, aka those with an account, to create, upload, and delete from the storage.
I added a has_img column to the users table to tell if the user has added or deleted their profile photo.
If false, it means that they have no profile picture set - this is the default.
If true, it means that they have a profile picture set.
The URL is then constructed using the user's userID.
const fileName = `users/${session.user.id}.jpg`;
const buf = Buffer.from(img, 'base64');

const { data: imgData, error: imgError } = await supabase.storage.from('public')
  .upload(fileName, buf, {
    contentType: "image/jpeg",
    upsert: true,
    cacheControl: "0",
  });
if (imgError) throw { error: imgError, session: newSession };
const { data: userData, error: userError } = await supabase
  .from("users")
  .update({ has_img: true })
  .eq("id", session.user.id);
if (userError) throw { error: userError }

return {
  statusCode: 200,
  body: JSON.stringify({
    imgUrl: `https://stolploftqaslfirbfsf.supabase.in/storage/v1/object/public/${imgData.Key}`,
    session: newSession,
  }),
};
Session management
Another problem I ran into was that I needed the user's current login session so that they can upload or delete images.
Our current method of keeping the user "logged in" is storing their userID and username in the session storage.
This was unsafe as the user can easily change it and cause errors when doing database operations.
Hence, I decided to add some form of session handling as well.
To do this, I stored the user's session whenever they signed up or signed in, and sent the session data to the serverless functions every request. I then set the session as shown:
const { session, error: sessionError } = await supabase.auth.setSession(clientSession.refresh_token);
const { data: newSession } = await supabase.auth.refreshSession();
I had to use this method because the Supabase JavaScript client is more suited for using it on the client-side, but it is only safe to do so if I've added proper Row-Level Security (RLS) on the database, which I didn't have time to implement.
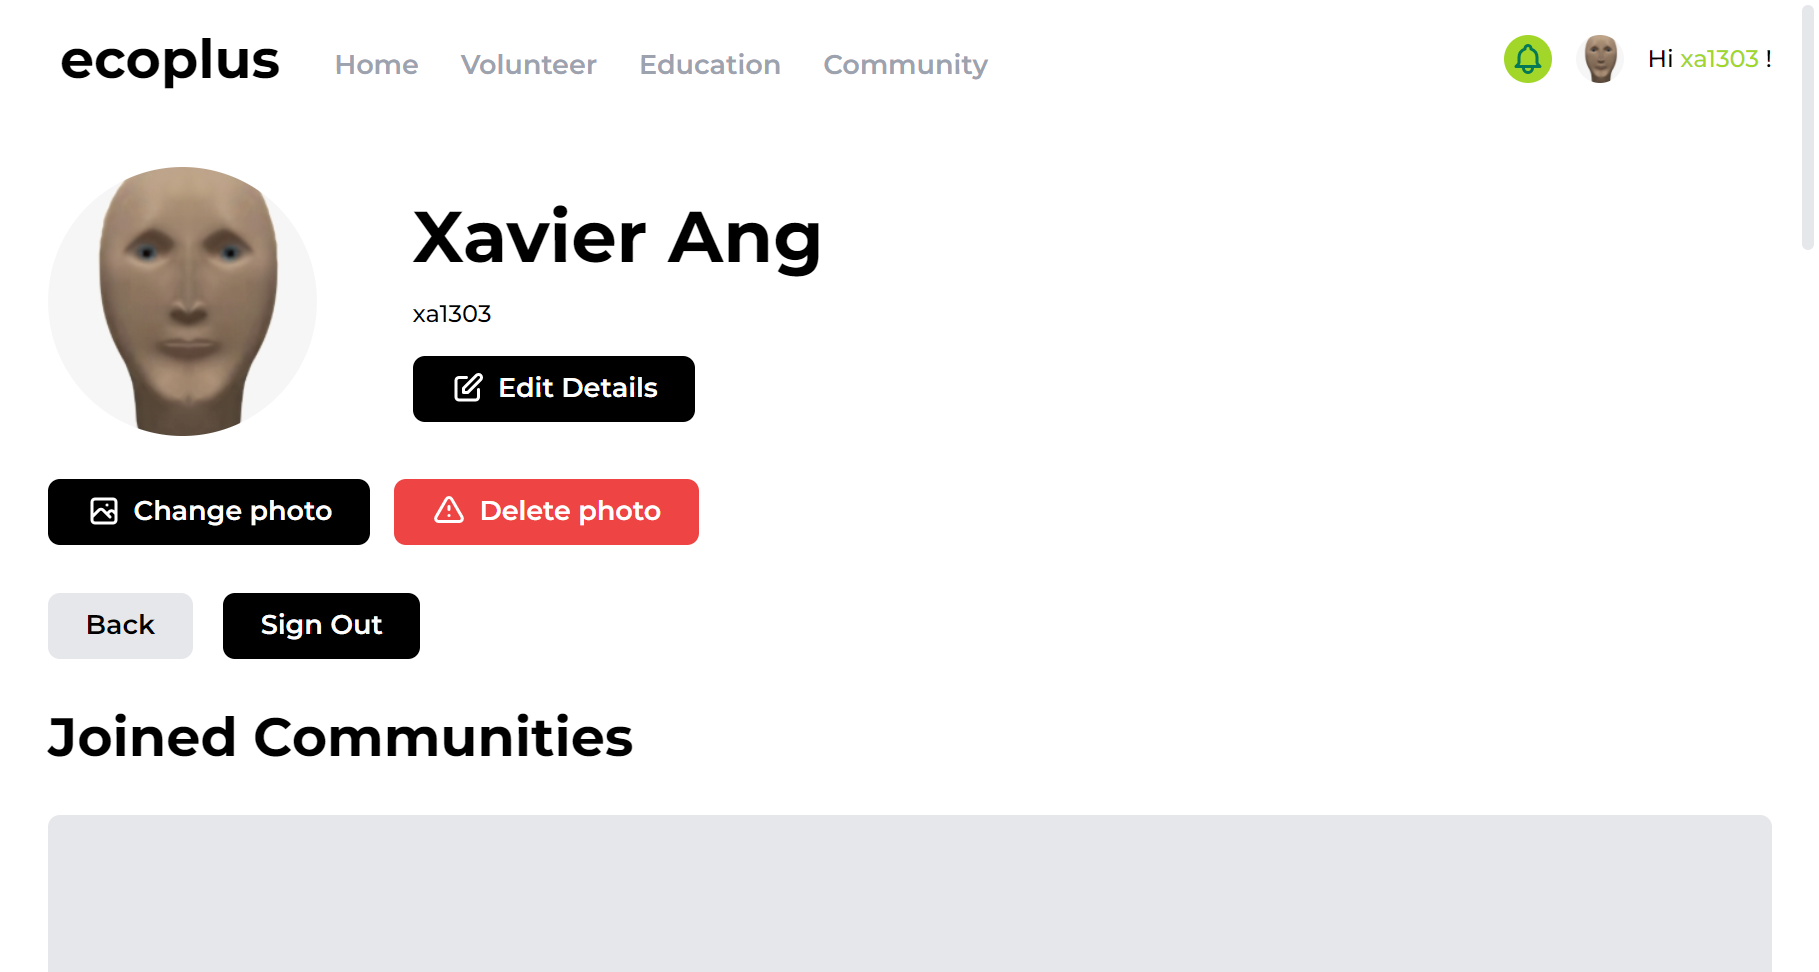
Account page UI
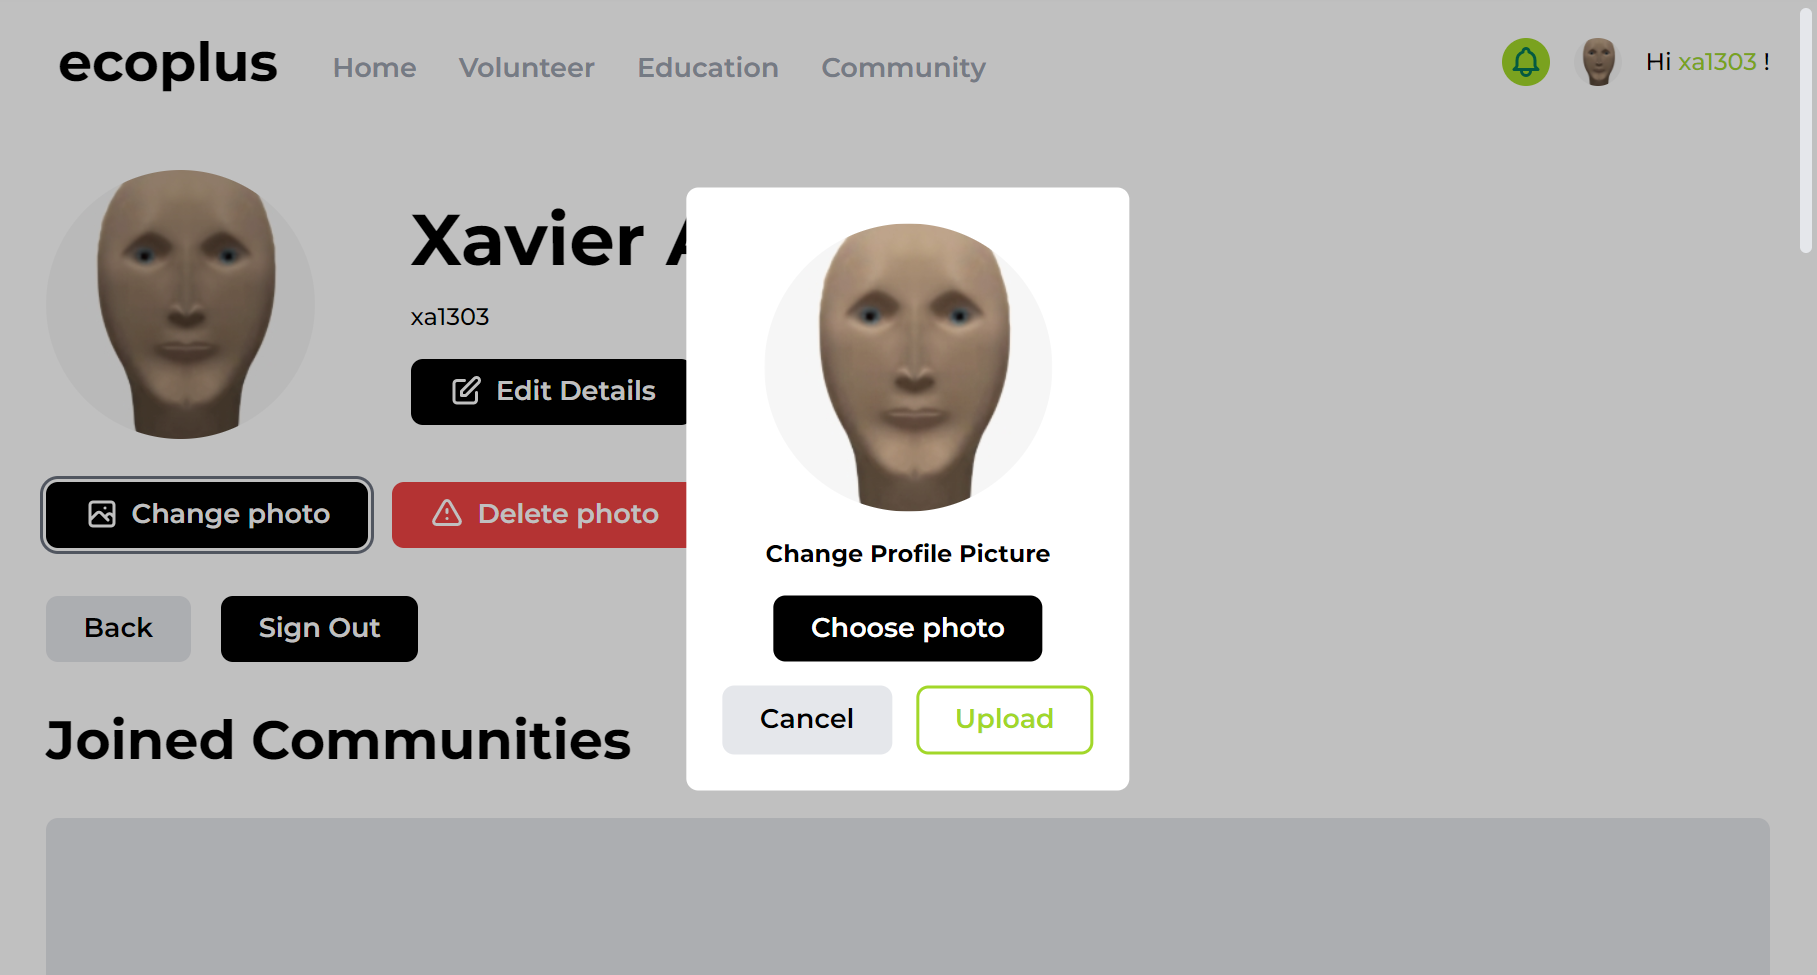
After settling most of the backend issues, I proceeded to create the front-end. In the user's account page, I added a button for the user to change their photo.
On clicking it, a modal form is showed that allows the user to select an image and upload it.
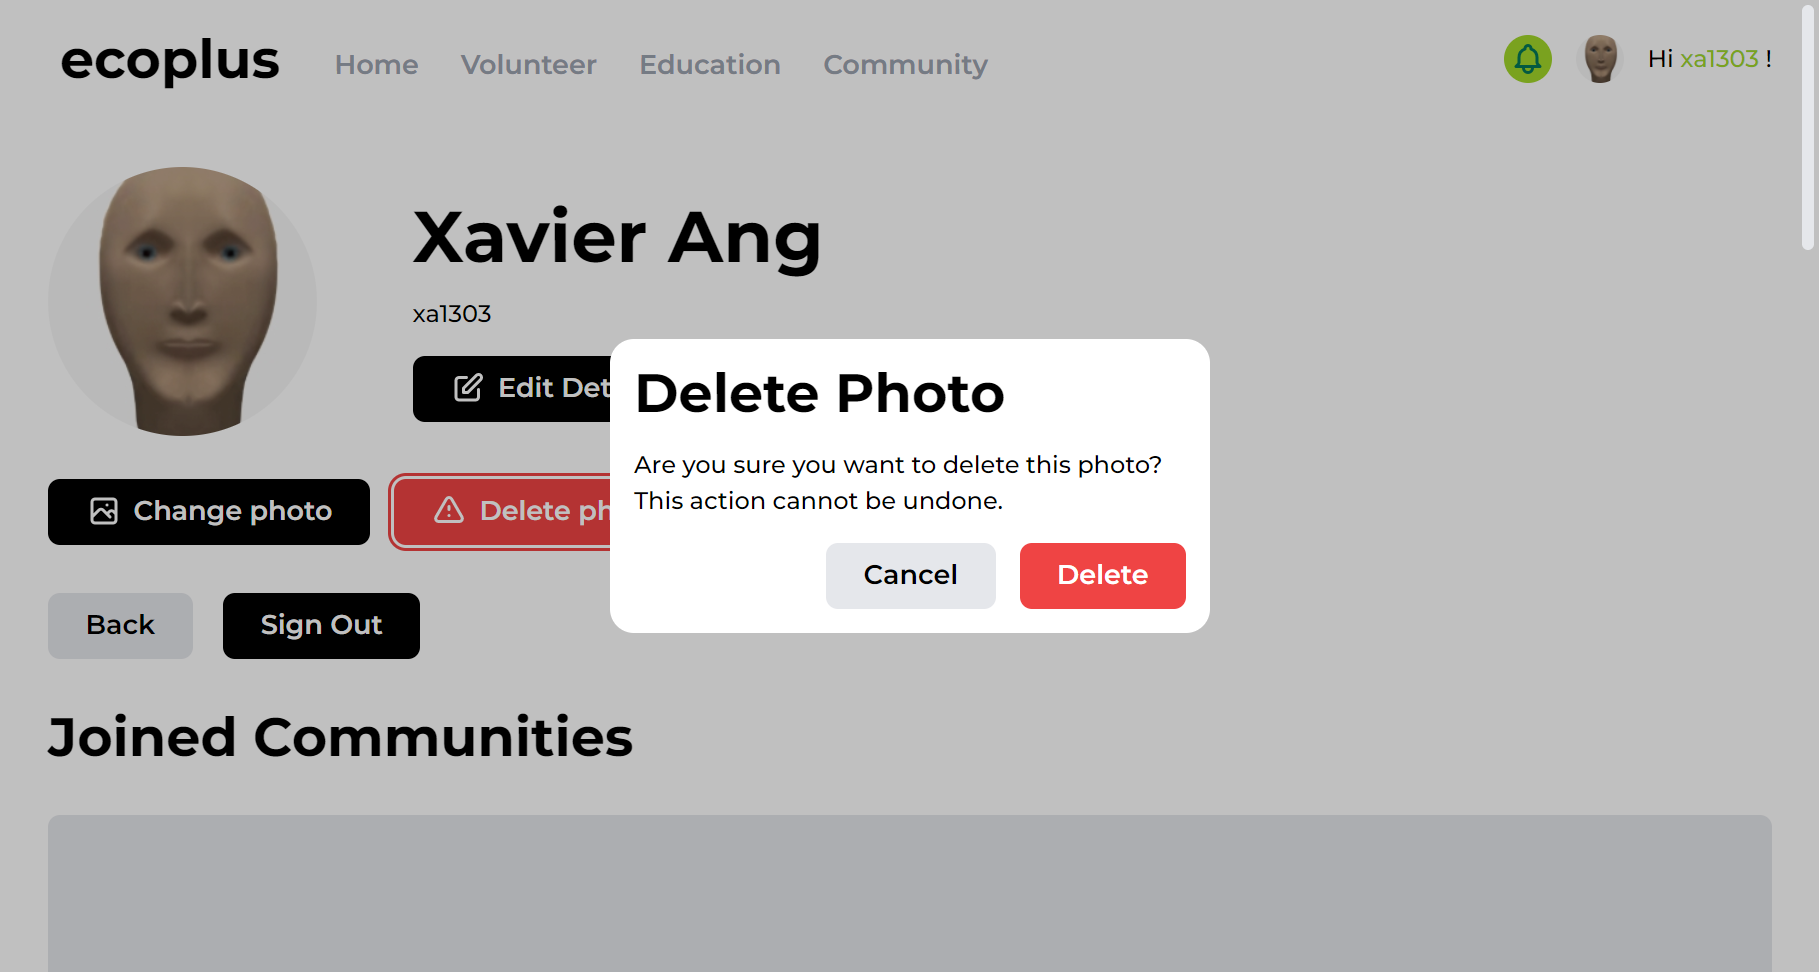
I also added a delete button, whose operation was not that much of a hassle as uploading the image to implement.
Putting it all together
After I had done the image upload and delete functionality, Kah Seng used my code as a guide for doing adding the same funcionality to the community and event pages. However, his UI was a bit different, so I changed mine to fit his. He also forgot to add the code for previewing the uploaded image, so I did that for him since he was very busy implementing the other features.
Finally, I had to update pages with comments to show the user's profile photo if they had one.
For this part, I made the dynamic addition of elements more efficient by using document.createElement instead of appending a string to the comments container, which was 2x faster.
I also took feedback from Kah Seng and added the time a person commented to provide more information and possibly sort by time commented in the future.
function fillComments(elementCss, posts) {
    const commentsFragment = document.createDocumentFragment();

    // Underscored variables will be cloned later.

    // Main container
    const _commentContainer = document.createElement("div");
    _commentContainer.classList.add("rounded-lg", "border-4", "p-4", "flex");

    // To display user's profile picture (if they have one)
    const _pfpImg = document.createElement("img");
    _pfpImg.classList.add("rounded-full", "h-12", "w-12");

    // To display a grey circle (if user doesn't have profile picture)
    const _pfpDiv = document.createElement("div");
    _pfpDiv.classList.add("rounded-full", "bg-gray-200", "h-12", "w-12");
    // Comment container for _username and _comment
    const _commentContent = document.createElement("div");
    _commentContent.classList.add("ml-4", "flow-col");

    const _username = document.createElement("span");
    _username.classList.add("font-bold");

    const _datetime = document.createElement("span");
    _datetime.classList.add("font-light", "text-sm", "ml-2", "text-gray-300");
    _datetime.style.color = "rgb(156 163 175)";

    const _comment = document.createElement("p");
    for (const post of posts) {
        let commentContainer = _commentContainer.cloneNode(true);
        let pfp;
        let commentContent = _commentContent.cloneNode(true);
        let username = _username.cloneNode(true);
        let datetime = _datetime.cloneNode(true);
        let comment = _comment.cloneNode(true);

        commentContainer.setAttribute("data-datetime", post.created_at)
        if (post.has_img) {
            pfp = _pfpImg.cloneNode(true);
            pfp.setAttribute("src", post.imgUrl);
        } else {
            pfp = _pfpDiv.cloneNode(true);
        }
        username.insertAdjacentText("afterbegin", post.username);
        datetime.insertAdjacentText("afterbegin", datetimeFormat(post.created_at));
        comment.insertAdjacentText("afterbegin", post.post);

        commentContent.appendChild(username);
        commentContent.appendChild(datetime);
        commentContent.appendChild(comment);
        commentContainer.appendChild(pfp);
        commentContainer.appendChild(commentContent);
        commentsFragment.append(commentContainer);
    }
    $(elementCss).empty();
    $(elementCss).append(commentsFragment);
}
function datetimeFormat(datetime) {
    const d = new Date(datetime);
    const date = `${d.getDay()}/${d.getMonth() + 1}/${d.getFullYear() % 100}`;
    const h = d.getHours();
    const M = d.getMinutes();
    const time = ` ${h < 10 ? 0 : ""}${h}:${M < 10 ? 0 : ""}${M}`;
    return date + time;
}